Friday, November 25, 2011

Tuning in to Christmas

Yep, I'm one of THOSE people...


...I love Christmas music.

On the radio, the television, and the CD player... I've been tuning in to the Christmas spirit lately.
I love the classics sung by the likes of Bing Crosby, the newer versions sung by the cast of Glee, and even the instrumental interpretations.  

Around here, it not only sounds like Christmas, it is beginning to look quite festive as well.  The usual decor has been exchanged for our Wintertime colour palette of Red, Grey, White, and Turquoise.


The Advent Tree is ready and waiting for December 1st...


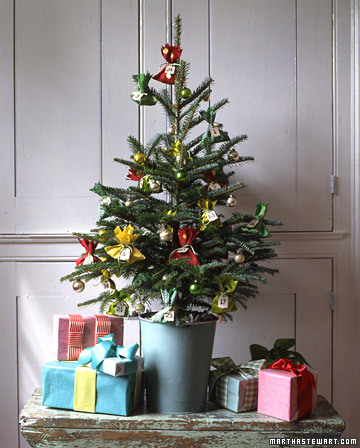
And the big tree has been up for a week now...


Some of the tree's decorations are new, like this jeweled mercury glass ball.  Things from around the house also adorn the tree, such as starfish and Seashell Stars.  Decorative balls that are usually displayed in bowls are tucked within the branches as well.  The shimmering red and silver tree skirt was handmade by my Mom {thank you!}.


One of my favourite ornaments is this white and silver owl and luckily it came in a set of three!  The woodland creature theme also shows up on a plush reindeer pillow that my Mother-In-Law gave to me {thank you, Robin!}.  For now, until I find the perfect star, our temporary tree topper is a white finger starfish.  Who knows, maybe it will stay.  Silver, white, and red ribbon wrap down the tree and I found this video to be so helpful when doing this.


The baby gate has also been transformed for the season and Oliver's holiday buddies have arrived too...


Instead of adding lots of expensive pillows, a few extra throw blankets create a cozy place to sit.  I found simple fleece throws in red and grey for only $5 each.  Now, it's the perfect spot to relax, enjoy the inviting glow of the tree, watch some holiday movies, and of course...


...listen to some Christmas music!


Thanks for dropping by.


I'm sharing this with...

The Nester's Christmas Tour of Homes


Wednesday, November 23, 2011

Creating A Christmas Advent Tree

This year will be the first Christmas in our new house.  I am so excited about the holiday decorating, the baking, and the time we will spend with family and friends.  Since we've purchased a new large tree, the little tree from my apartment days was destined to stay packed away in the basement.  Until I saw this...


source


I'd been thinking of creating some sort of Christmas advent project for our son Oliver, so when I found this advent tree on MarthaStewart.com I knew that my search was over!  And as an added plus, my little tree would be able to spread some Christmas cheer once again.

Here it is all decked out with little presents for Ollie - one for each day in December leading up to Christmas...


And here's how it all came together...


Cut It Out
Burlap can be found at the local hardware store this time of year, but instead of wrapping trees and plants with it, start by cutting it into squares or rectangles.  The size will depend on the toys and treats that will go inside.  Jute string is also cut into lengths.


Toys & Treats
Place a toy or treat - or maybe even both - in the center of each burlap square.  Some suggestions...


Dinosaurs and Chocolate Santas


Cars and Coins (chocolate or real)

Whether it's crayons, little books, blocks, cars, or dinos, whatever your child is into at the moment will do!


Wrap It Up
Bring the corners of the burlap together then tuck as necessary and tie with a piece of jute, string or ribbon.


Nifty Numbers
Stick-on numbers get the job done quickly and easily.  If you have the time, other options for adding on numbers include painting, stenciling, or using decorative tags.


"Tree" Lights
Since there aren't any electrical outlets where our advent tree sits, I thought that a string of battery operated Christmas lights would work, but I was unsuccessful in finding any at our local department store.  So I picked up a few packages of these battery tea lights or "tree" lights.  It's so worth the little bit of extra effort to turn each one on/off individually.  The flickering glow is absolutely magical!


Top That Tree
A little teddy makes the perfect tree topper.  A piece of numbered burlap is tucked into the little pouch on this guy (it's actually for a gift card), but could also be pinned, tied, or sewed on.


Our completed Advent Tree is a welcoming addition to our front foyer.  It is decorated simply with ribbon, "tree"lights, and 24 little burlap bundles; a knitted scarf becomes a tree skirt when draped around the base.


The tree sits on my recently completed Weathered Turquoise Side Table.  The drawers will be perfect for tucking away the burlap and jute when they are opened each day.  That way they'll be organized and ready for next year.  A pretty box or basket would work great for this too.


Now all we have to do is wait until December 1st!


Thanks for stopping by.


I'm sharing this with...

Stay At Home Nation


.

Tuesday, November 22, 2011

Weathered Turquoise Side Table

This past summer, I started working on a furniture project and now several months later...


It's finally finished!


What do you think?  The sides and top of this little side table have been painted, and distressed.  After much hemming and hawing, I chose to leave the drawers, legs and hardware since I quite like their vintage look and the burl wood veneer.


BEFORE


If you'd like to create a similar look, here's the how to...


Prep
Give the table a good washing and remove drawers.  Sand the surfaces to be painted.  If the surface is a veneer (thin layer of wood), like this particular table, be careful not to over sand.


Prime
A good quality primer, such as Zinsser Cover Stain, is the first layer to go on.  It is an oil-based primer, so inexpensive throwaway foam brushes are a good choice to avoid messy cleanup.


Paint
Time for the first colour.  This is Majestic Blue from Benjamin Moore.  Since we're going for a weathered look here, the visible brushstrokes are intentional... so don't sweat the streaks!


Wash & Wipe
The next coat is a wash made by adding water to Benjamin Moore's Ashwood.  Working in sections, apply the wash then brush off the excess with an extra dry brush.


Sand It
Sanding creates a distressed and aged look.


Seal It
Add a layer of protection with 2 - 3 applications of a clear coat such as Varathane Crystal Clear Diamond Wood Finish.  This is a water based polyurethane that has a clear, non-yellow finish and it's available in a spray or brush on format.


There we have it.  Finally.
For now, the table is in our foyer... a great little spot to place a bowl for mail, small items, and whatever the heart desires at the moment.


As always, your thoughts, comments, and suggestions are welcome.

Do you like the burl wood drawers?  Or do you think I should paint them?  What about the legs and hardware?  Let me know what you think! 


Thanks for stopping by.


I have not been compensated in any way for mentioning the products in this post.
They just happen to be the products that I chose to use for this project.


I'm sharing this with...

Stay At Home Nation
Under The Table and Dreaming 
Miss Mustard Seed

Tip Junkie handmade projects

Saturday, November 19, 2011

Forks and Spoons {An Egg Salad Recipe}


Oliver likes his independence.

When out for a walk, he doesn't need a hand to hold.  And he'll be sure to let you know that if you try.

Since early on, he's been confidently eating finger food, and the days of mashing food and spoon feeding him seem like distant memories.


Forks and spoons have been a fun addition to mealtimes of late.  Yesterday we tried out some yogurt.


Oliver thoroughly enjoyed using his own spoon...


...and his upside-down spoon style was surprisingly effective.


So today, when lunchtime rolled around, Oliver was hungry as usual...
Where did that tummy rumble come from?


Time to fill up that tummy!  An egg salad sandwich does the trick, especially when eaten with a fork and spoon.


We used this Canadian Living recipe for egg salad as a referance and made it our own.
If your tummy is rumbling too, here's how to make and serve this classic sandwich just like Ollie...


Egg Salad

6 eggs
1 celery stalk
2 green onions
4 tsp olive oil mayonaise
4 tsp plain Greek yogurt
1/4 tsp salt
1/4 tsp paprika


  1. In saucepan, cover eggs with cold water and bring to boil on high heat.  Reduce heat to low and simmer for 1 minute.  Remove from heat, cover, and let stand for 15 minutes.  With slotted spoon, remove eggs from pan and place into bowl.  Run cold water over eggs.  Crack and peel egg shells.  Chop the hard boiled eggs. 
  2. While eggs are cooking, finely chop celery and green onions.  With a fork, mix together the celery, green onions, mayo, yogurt, salt, paprika and eggs.

Serve on whole grain bread, with a side of tomato and a glass of milk...


...and a fork and spoon, of course.


Thanks for stopping by.


.

Monday, November 14, 2011

Award x 2

I am truly honoured to have received not one, but TWO lovely blog awards lately...


First, is the Versatile Blog Award from Jodi over at In Corners of My Mind.  Whether the topic is art, design, or family life, her posts always have me smiling.


To accept this award, thank the person who awarded it to you
and include a link to their blog. Then choose up to 15 fellow bloggers
that you've recently discovered or follow regularly
to pass the award along to and share 7 things about yourself.


So here are a few things about myself...


  1. I'm an only child.
  2. I can never remember how old I am... I think that I just stopped bothering to keep track after 21.
  3. My Front Porch Ferns have been relocated indoors.  I usually kill houseplants, so hopefully they'll survive the winter... and me.
  4. I don't have a smartphone, but I'm thinking of getting one... any suggestions?
  5. I am SO excited for Christmas this year and decorating our house for the holidays... I have a few projects in the works and will be sharing them in the coming weeks.
  6. Doctor Who is my all time favourite TV show.
  7. Although charcoal seems to be the best medium for me as an artist, I've been thinking a lot about painting and printmaking lately... now I just need to find the time and motivation!


...and here are my nominations for The Versatile Blogger Award...


Sugar & Spice in the Land of Balls and Sticks is the place to find recipes, DIY, and many incredibly creative projects.  I always find myself inspired by all of the clever and cost effective ideas and tips!


Over at Momnivore's Dilemma, Nicolette's posts are absolutely hilarious as well as informative.  You'll find crafts, nutritious food, a great link party, and her family's experiences with autism.  She'll have you laughing one moment and tearing up the next!


Now on to award number two...


The Liebster Blog award is given to blogs that are considered up-and-coming and have under 200 followers.  And once again I am so honoured!

This award is from The S.I.P. Project - where incredible exchanges are beginning to take place... Fabulous photo shoots in exchange for service projects that benefit charities, communities, and causes.  I'm looking forward to seeing the entire project enfold!


I'd like to pass the Leibster Blog award on to...


Miss Amy at I do have a real job... I swear.  Motivating ideas and articles are plentiful there... and some great recipes too.  Be prepared to be inspired!


Thanks for stopping by.


.

Wednesday, November 9, 2011

31 Days of Words to Live By {The Complete Series}


This is the place to find all of the posts during my blog series, "31 Days of Words to Live By".
For the month of October, I shared my favourite quotes and sayings while incorporating them into daily life.

This series was inspired by The Inspired Room, where you'll find other "31 Days" series among many other wonderful things!


Day 28: Shoot for the Moon
Day 30: A Little Bit of Magic
Day 31: Our Halloween Home


It was actually a lot of fun and I didn't even get to use all of my favourite quotes!  Maybe I'll get a head start on next year's series.  Do you have any sayings or quotes that you'd like to share?  I'd love to hear them.

Thank you to everyone who shared their thoughts and comments throughout the series.

And hopefully...


 Y'all will come back now ya hear!


.