Showing posts with label Food. Show all posts

Wednesday, February 12, 2014

Raw Kale Salad with Beans and Veggies

This simple recipe of mine has become one of my favourite lunches.  I like to wash up an entire bunch of kale or two, rip the leaves into pieces, and store them in a Ziploc Fresh Produce bag.  Then, it's ready to make salads with and can be thrown into all kinds of other recipes for the whole week.  When I also have a batch of this bean and veggie mixture made up in a large container, my lunches are set for a few days.  Switching up the type of beans and vegetables, offers an endless array of combinations and flavours.


RAW KALE SALAD WITH BEANS & VEGGIES
Makes approx. 4 servings

1 can of navy beans (black beans or black eyed peas are great options too)
1 tomato or 1/2 cup grape tomatoes cut in half
1 cup frozen corn, cooked according to pkg.
1 red pepper, chopped
1 orange pepper, chopped
1/2 cup cucumber, chopped
1 green onion, chopped
1- 2 avocado, chopped
juice and pulp of 1 orange
kale, de-stemmed and torn into pieces
sesame seeds
salt
pepper

Combine beans, tomato, corn, peppers, cucumber, green onion, avocado.  Cover with orange juice.  Mix well, making sure avocado is well coated.  Serve over kale.  Sprinkle with sesame seeds and salt and pepper.

This salad is simple, healthy, and goes great with a glass of carrot juice!  Sometimes, on the second or third day, I'll add in an extra avocado to freshen it up a bit.  Other times, I'll toss in a handful of cashews if it feels like I need the extra fat and protein.  Mix it up and make it your own by trying out different combinations of beans, veggies, nuts, and seeds.


I am sharing this at...
Moonlight and Mason Jars Link Party :: Tasty Tuesday at I'm Not a Trophy Wife


Sunday, January 19, 2014

Ode to Carrot Juice

I have accidentally stumbled upon something incredible.

Last month, I was really sick with a stomach bug.  The kids had it too.  I have never been that sick before.  It was awful.  Caring for and cleaning up after two little ones with tummy troubles while also feeling so ill wasn't fun either.  My husband Chris had to work, so thankfully my Mom travelled up our way and stayed for awhile to take care of us!

Well, while she was here, we picked up a few Bolthouse Farms fruit and veggie drinks.  They're the ones found in the produce section at the grocery store (I am not affiliated with Bolthouse Farms in any way.  You can read my disclaimer here).  We thought that since my stomach couldn't handle solid food, it would be a good way to get some sort of nutrition.

One of those juices was a giant bottle of carrot juice.


I was a bit hesitant to try it and even put it off for awhile.  I thought it would be on par with tomato juice which I DO NOT LIKE.  I am reminded of the time when my friends were drinking Caesars (similar to a Bloody Mary, for all of the American readers) and I thought that I should too.  It was not pretty.  And it wasn't because of the vodka.

Anyway...
I didn't try the carrot juice until well after the illness left our household and my Mom returned to her home.  When I finally tasted it, I was shocked.  It was fantastic!  It's a little bit sweet and absolutely delicious served ice cold.  This Bolthouse version contains a whopping 380% of your recommended daily intake of vitamin A and is only 70 calories per 1 cup serving.

According to my research...
(if you watch The Magic School Bus as much as we do, that phrase may make you smile)

Each cup contains a whole lot of vitamins and minerals too.  These include the aforementioned vitamin A, vitamins C, E, & K,  various B vitamins, potassium, folate, manganese, phosphorous, magnesium and zinc.  While the old adage that carrots improve eyesight holds true (did I detect a slight improvement in my horrible night vision while driving the other night?), particularly if you have a vitamin A deficiency, there are also a number of other health benefits that this super food provides.  Everything from helping dry skin to preventing cancer seem to be on the list of amazing things that carrots can do.  "The antioxidants and phytochemicals in carrots may also help with blood sugar regulation, delay the effects of aging, and improve immune function." (Nordqvist, J. (2013, December 16). "What are the health benefits of carrots?." Medical News Today. Retrieved from http://www.medicalnewstoday.com/articles/270191.)


How often does something so good for you also taste so amazing?

It sounds silly, but carrot juice makes me feel like skipping and twirling around like a little girl.  Maybe it's all of the antioxidants.  Maybe it's all of the vitamin A.  Whatever it is, I love this stuff and drink at least one glass a day (remember to check with your doctor before changing your diet, especially if you have any pre-existing medical conditions).  I've also read that drinking 3 cups or more a day can turn skin orange!  So I try not to overdo it.  Like that episode of The Magic School Bus where Arnold turns orange after eating too many Seaweedies.

Well, I couldn't title this post "Ode to Carrot Juice" without including one.  So here it is...


Ode to Carrot Juice

Oh carrot juice!
Sweet orange nectar
As a seed you start
So small.
Within Earth's embrace,
You grow.
Nourished by soil, sun,
Rainfall.
A hidden wonder lies
Below.
Your destiny we shall not
Forestall.
For, your great goodness, now
I know.
Nature's nourishment is the gift you impart
To all.


Thursday, January 2, 2014

Peanut Butter Cup Cookies


Yep, these are just as good as they sound.  So good, that I usually reserve them for special occasions.  This past Christmas, I tweaked the original recipe slightly by switching regular peanut butter for the natural 100% peanuts kind.  Also, I replaced cow's milk (that's what Oliver calls milk now) with unsweetened almond milk.  They turned out better than ever!  And since the changes are healthier ones, they make this little pleasure just a tiny bit less guilty.

Here's my new version of the recipe...

Peanut Butter Cup Cookies

1 3/4 cups flour
1/2 tsp salt
1 tsp baking soda
1/2 cup butter, soft
1/2 cup white sugar
1/2 cup natural, 100% peanuts peanut butter
1/2 cup packed brown sugar
1 egg, beaten
1 tsp vanilla
2 tblsp unsweetened almond milk
40 mini peanut butter cups

Preheat oven to 375.
Mix together flour, salt, baking soda.  Set aside.
Cream butter, sugar, peanut butter, and brown sugar until light and fluffy.
Beat in egg, vanilla, and milk.
Add flour mixture.
Mix well.
Shape into 40 balls and place into un-greased mini muffin pan.
Bake for 8 min.
Remove from oven and immediately press mini peanut butter cups into each ball.
Let cool and place in freezer for a few min until chocolate sets.
Carefully remove from pan.

Enjoy!


 I am sharing this at...
Moonlight and Mason Jars Link Party :: Tasty Tuesday at I'm Not a Trophy Wife


Monday, March 12, 2012

My Story of Grandma O'Donnell's Banana Bread

Today I'm going to share with you the most incredible banana bread recipe... ever.

This recipe holds a very special place in my heart not only because it was given to me by my best friend Meghan O'Donnell (given to her by her Grandmother, who is an amazing woman both in and out of the kitchen), but also because it was the first thing that I ever really baked on my own.


It was back when I was in college and at a time when I was absolutely hopeless in the kitchen.  I would set off the smoke alarm trying to heat up a can of soup!  Well, one day, I had a bunch of overripe bananas and decided to give this banana bread recipe a try.


Grandma O'Donnell's Banana Bread

3 bananas, mashed (sometimes I sneak in an extra one)
2 eggs
1 cup sugar
1/2 cup oil
1 tsp vanilla
1 tsp salt
1 3/4 cup flour
1 tsp baking soda
1/2 tsp baking powder
1 1/2 to 2 cups chocolate chips (optional)

In a large bowl, cream together the bananas, eggs, sugar, oil, vanilla, and salt.
In a medium bowl, sift together the flour, baking soda, and baking powder.  Add to wet ingredients.
Fold in chocolate chips if using.
Bake at 350F for 35-40 minutes for 2 loaf tins, 20-25 minutes for muffins.


Much to my surprise, the end result was absolutely fabulous!  I realized that maybe I wasn't a complete dunce in the kitchen after all.  That banana bread was the initial spark that began my love affair with baking, cooking good food (and eating it), and building up my recipe box with the best tried and true recipes.


I can now hold my own in the kitchen and have learned a lot from my husband (a former cook), friends, and family members.  But I have found that the best way to gain knowledge is by doing.
So my own personal philosophy is this...

Try recipes.  Try hundreds... thousands... even millions of recipes.  Each recipe will impart new techniques, tips, and tricks to add to your set of skills.  If you don't know how to do something called for in a recipe, look it up.  Learn, attempt, experiment, and step out of your comfort zone.  You will find some fabulous recipes and you will experience a few flops too, but once you've cooked through a large multitude of recipes, you'll have amassed not only a great selection of recipes, but a collection of kitchen knowledge and confidence.


I like to find recipes on cooking shows, in cookbooks (our local library has a great selection), and online.  The comments and reviews found on most online recipes are excellent resources as well.  Some of these recipes can be found on my Recipe Box page (find the link at the top) and there are many recipes I have yet to share with you, so stay tuned!

And now, this banana bread recipe has become even more special to me.  A couple weeks ago, my son Oliver and I made this recipe together.  It was his first time helping in the kitchen and he loved it!  Since then, baking and cooking together has become one of our favourite family activities...


...and I'm sure it will be for years to come!


Thanks for stopping by and please visit
to see the incredible artwork of my friends
Meghan & Katelyn O'Donnell.


Friday, February 24, 2012

Twinkle Toast and Star Sandwiches

Today, I am excited to share with you Oliver's favourite breakfast of late...


Making this star-shaped "Twinkle Toast" is easy peasy.


And at Oliver's request...


...his favourite cereal supplies the finishing touch.


When lunchtime rolls around, Ollie's favourite - tuna & "toe-toes" - get the star treatment as well.


A few quick cuts when making meals is definitely worth the delight on his face and "twinkle" in his eyes!


Thanks for dropping by.

Andrea


I'm sharing this with...


Under The Table and Dreaming


Tuesday, February 14, 2012

Oliver's Valentine

My husband Chris and I don't usually make a big deal out of Valentine's Day, so I haven't done any projects or decorating for this "holiday" (although I have thoroughly enjoyed browsing all of the amazing ideas on Pinterest and in Blogland).

After waking up to a lovely gift of perfume and candy, as well as opening the cute cards sent from Ollie's Grandparents (thank you everyone!), I began to "feel the love".

It was time to get the heart themed ideas and images that have been floating around in my head over the past week or so onto film (well, memory card, actually).


Saturday, February 11, 2012

A Little DIY for a Fresh Fridge

We do quite a lot of cooking (and eating) around here and I love trying out new recipes and ingredients.  This means that after the bi-weekly trip to the grocery store, our fridge is packed full of fresh goodies and produce.  Storing and using it all up before spoilage occurs can sometimes be a challenge.  So this idea was inspired by the ol' herbs in a glass of water trick as well as some of the commercial herb savers on the market these days...

 DIY Herb & Greens Saver


Saturday, January 28, 2012

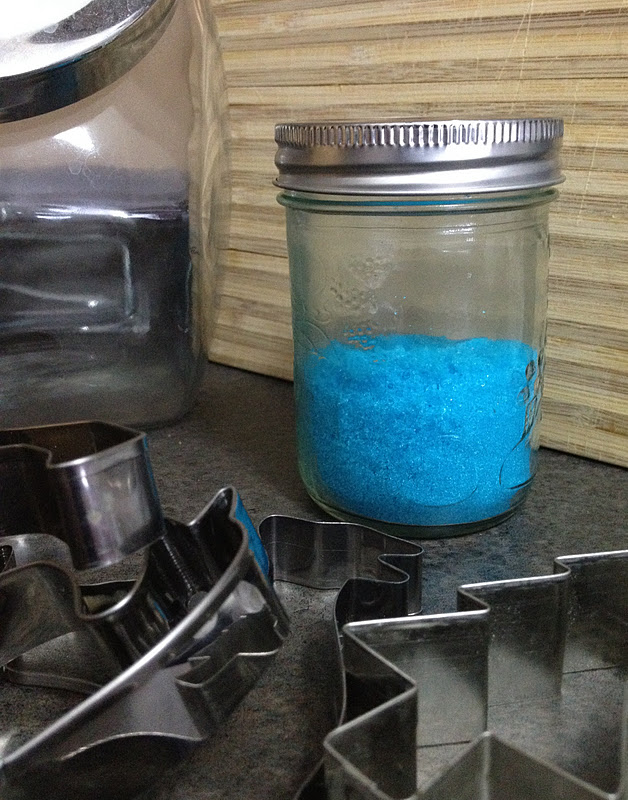
The Cookies Are Calling {Home Made Decorative Sugar}

The other day, I came across the extra sugar cookie dough that was put in the freezer around Christmastime.  Cake, pie, candy, and chocolates... they're all absolutely delicious, but for me the reigning sweet treat of them all are cookies.  So, while a little bit dangerous, I thawed that lovely ball of dough and began choosing cookie cutters.

Not up for fiddling around with a batch of icing, I needed a quick and easy way to decorate those cookies.  I was wishing that my pantry was stocked with coloured decorative sugar when I realized... why not make my own coloured sugar!


Saturday, November 19, 2011

Forks and Spoons {An Egg Salad Recipe}


Oliver likes his independence.

When out for a walk, he doesn't need a hand to hold.  And he'll be sure to let you know that if you try.

Since early on, he's been confidently eating finger food, and the days of mashing food and spoon feeding him seem like distant memories.


Forks and spoons have been a fun addition to mealtimes of late.  Yesterday we tried out some yogurt.


Oliver thoroughly enjoyed using his own spoon...


...and his upside-down spoon style was surprisingly effective.


So today, when lunchtime rolled around, Oliver was hungry as usual...
Where did that tummy rumble come from?


Time to fill up that tummy!  An egg salad sandwich does the trick, especially when eaten with a fork and spoon.


We used this Canadian Living recipe for egg salad as a referance and made it our own.
If your tummy is rumbling too, here's how to make and serve this classic sandwich just like Ollie...


Egg Salad

6 eggs
1 celery stalk
2 green onions
4 tsp olive oil mayonaise
4 tsp plain Greek yogurt
1/4 tsp salt
1/4 tsp paprika


  1. In saucepan, cover eggs with cold water and bring to boil on high heat.  Reduce heat to low and simmer for 1 minute.  Remove from heat, cover, and let stand for 15 minutes.  With slotted spoon, remove eggs from pan and place into bowl.  Run cold water over eggs.  Crack and peel egg shells.  Chop the hard boiled eggs. 
  2. While eggs are cooking, finely chop celery and green onions.  With a fork, mix together the celery, green onions, mayo, yogurt, salt, paprika and eggs.

Serve on whole grain bread, with a side of tomato and a glass of milk...


...and a fork and spoon, of course.


Thanks for stopping by.


.

Saturday, October 29, 2011

Day 29: Happiness Is Cheesecake


"We tend to forget that happiness doesn't come as a result of getting something we don't have, but rather of recognizing and appreciating what we do have."

- Frederick Keonig


Well, what I do have is cheesecake.  Pumpkin Praline Cheesecake, to be exact.
And it sure does make me happy.

I found the recipe in the Kraftfoods What's Cooking magazine, Fall 2011 issue.  I've never attempted cheesecake before, but decided to give it a try.  I'm glad I did!


Here's the recipe... it just might bring you a little bit of happiness too...


Pumpkin Praline Cheesecake


INGREDIENTS


Cheesecake
 
3/4 cup Graham Crumbs (I like to buy the crackers since we can use them for other things, then just chop into crumbs in the food processor)
1/2 cup finely chopped pecans (once again, food processor works like a charm)
3/4 cup packed brown sugar, divided
3/4 cup granulated sugar, divided
1/4 cup butter, melted
1-1/2 cups canned pumpkin
3 eggs
1-1/2 tsp. ground cinnamon
1/2 tsp. ground nutmeg
1/2 tsp. ground ginger
3 pkg. (250 g each) Brick Cream Cheese, softened
1 Tbsp. cornstarch
 

Praline
 
1/2 cup granulated sugar
2 Tbsp. water
1/2 cup chopped pecans


DIRECTIONS


Cheesecake:

  1. MIX graham crumbs, nuts, 1/4 cup each brown and granulated sugar, and butter; press onto bottom of 9-inch springform pan. Refrigerate 1 hour. 
  2. HEAT oven to 350ºF. Whisk pumpkin, remaining brown sugar, eggs and spices until well blended. Beat cream cheese, remaining granulated sugar and cornstarch in large bowl with mixer until well blended. Add pumpkin mixture; mix just until blended. Pour over crust. 
  3. BAKE 45 to 50 min. or until centre is almost set. Run knife around rim of pan to loosen cake; cool completely before removing rim.
  4. REFRIGERATE for 4 hours. Meanwhile, prepare Praline.

Praline: 

  1. BRING sugar and water to boil in small saucepan on medium-high heat, stirring constantly. Continue boiling, without stirring, 5 to 7 min. or until syrup is thickened and golden brown.
  2. REMOVE from heat. Stir in nuts.
  3. SPREAD onto parchment-covered baking sheet. Cool.
  4. BREAK into bite-size pieces.  

TOP cheesecake with praline and whipped cream just before serving.


A few of my mistakes to avoid...

Please put a pan or cookie sheet under the cheesecake while baking.  I didn't and now have an oven that requires some serious cleaning.

I refrigerated the cheesecake between 2-3 hours instead of 4.  So it was still a little soft in the centre.

Also, don't top the entire cheesecake with the praline, like I did.  The praline is like a hard candy and makes for difficult cutting.  Although it won't look as pretty when displayed on the cake plate, next time I'll probably top each piece separately after cutting.


Mmm... a piece of cheesecake happiness. 


What makes you happy?


Thanks for stopping by.

This post is part of my blog series, "31 Days of Words to Live By".  For the month of October, I will be sharing my favourite quotes and sayings while incorporating them into daily life and art projects.

This series was inspired by The Inspired Room, where you'll find other "31 Days" series among many other wonderful things!

Check out the complete series.


I'm sharing this with...

Tip Junkie handmade projects

Wednesday, October 26, 2011

Day 26: Homemade Thin Crust Pizza Dough & Sauces


Ideas are like pizza dough, made to be tossed around.

- Anna Quindlen


Ever since reading the Summer 2011 issue of Cottage Life, I've been wanting to try Kris's Pizza Dough recipe on page 77.  Well, today I did... and the result was fantastic!


I modified the original recipe slightly by incorporating whole wheat flour.  Here's my version...


Pizza Dough

4 tsp active dry yeast
1 cup lukewarm water
1 tsp vinegar
2 cups all-purpose flour (plus extra as needed)
2 cups whole wheat flour

1 tsp salt
1 tsp sugar
1/3 cup olive oil (plus extra to coat dough and tray)


  1. In a small bowl, dissolve yeast in warm water and vinegar. Set aside for about 10 minutes, until mixture bubbles. Meanwhile, in a large bowl, sift flour, salt, and sugar.
  2. Make a well in centre of flour mixture. Stir in dissolved yeast and olive oil. Turn dough onto a lightly floured surface. Knead until smooth and slightly tacky, about 6–8 minutes. Add some extra flour (as much as 1 cup if dough is too sticky to work with).
  3. Roll dough into a ball. Coat with 1 tsp olive oil, place in a bowl, and cover with a clean tea towel. Let rise in a warm spot until doubled in size, around 30–45 minutes.
  4. Knead dough a few times and divide into 4 portions. Shape each portion into a ball; place on an oiled tray. Cover and let rise again until almost doubled in size, around 30–45 minutes.
  5. Preheat oven to 400°F. On a lightly floured surface, roll one portion of dough to desired thickness. Add sauce and toppings (don’t overload).  Place on a pizza pan or cookie sheet. Bake on the middle rack of oven for 15–20 minutes, or until crust is golden and cheese is melted.
  6. While each pizza is cooking, roll out and top the next one.


Make your own frozen pizzas too...
I decided to cook 2 pizzas and freeze the other 2.  Once rolled out and covered in sauce and toppings, I wrapped the pizzas destined for the freezer in a few layers of plastic wrap.  I'd wrap in tin foil as well, but our grocerystore was all out!  Placing the pizzas on cookie sheets in the freezer keeps them flat until they freeze. 


Now, on to the sauces...


For my red pizza sauce, I modified THIS recipe to our taste and ended up with this...


Red Pizza Sauce

1 can tomato paste
3/4 cup warm water
1 tblsp parmesan cheese
1/4 tsp onion powder
1/4 tsp garlic powder
1/4 tsp oregano
1/4 tsp basil
1/4 tsp honey
pinch cayanne pepper
pinch fresh ground pepper


  1. In a small bowl, combine tomato paste, water, parmesan cheese, onion powder, garlic powder, oregano, basil, ground black pepper, cayenne pepper.
  2. Let sauce sit for about 30 minutes to blend flavors
  3. Spread over pizza dough and prepare pizza as desired.


I love pizza with a garlic or white sauce.  So I revamped THIS recipe and came up with this...


Garlic Butter Pizza Sauce

2 tblsp butter, melted
2 tblsp olive oil
1 tblsp chopped garlic
1 tblsp parmesan cheese
1 tsp dried basil
1 tsp dried oregano


  1. In a small bowl combine butter, olive oil, garlic, basil, oregano and parmesan cheese.
  2. Let sit for at least 10 minutes and it will start to thicken.
  3. Spread mixture evenly on pizza dough and prepare pizza as desired.


Topping combinations are endless and homemade pizza night is a great way to use up what is in the fridge.  We used various combinations of leftover chicken from The Ultimate Roast Chicken, sauteed onions, bacon, spinach, and olives.


So good, that only 3 pieces were left...


...The perfect lunch for tomorrow.


Thanks for stopping by.


This post is part of my blog series, "31 Days of Words to Live By".  For the month of October, I will be sharing my favourite quotes and sayings while incorporating them into daily life and art projects.

This series was inspired by The Inspired Room, where you'll find other "31 Days" series among many other wonderful things!


Day 26: Homemade Thin Crust Pizza Dough & Sauces


I'm sharing this with...


Tip Junkie handmade projects

Tuesday, October 18, 2011

Day 18: Apple Butter


"Even if I knew that tomorrow the world would go to pieces,
I would still plant my apple tree."

- Martin Luther


Apples are just one of the wonderful aspects of the Autumn season.  After finding a simple crock pot recipe for Apple Butter in our local community magazine, I went off to find 5lbs of the Fall fruit at the market {around 15 medium sized apples}.  The end result was delicious!  Once jarred and decorated, this would make a lovely gift too.


Here's my take on the recipe...


Apple Butter


INGREDIENTS

5lbs of apples, peeled, cored and cut into small chunks {I used 15 apples of the "Paula Red" variety}
1/2 cup apple juice
2 tsp cinnamon
1/2 tsp nutmeg
1/4 cup brown sugar {or to taste}


DIRECTIONS

Combine apples, juice, cinnamon, and nutmeg in crock pot.
Cook on LOW for 10 - 12 hours, stirring occasionally. 
Uncover, leaving crock pot lid askew and cook for several hours more, until it reaches your desired consistency.  The longer you cook it, the thicker it will become.
Once done cooking, add brown sugar and cook on HIGH for 30 minutes, stirring frequently to avoid burning.
 

A Little Tip: While you can burn apple butter, you cannot over cook it.  So don't be afraid to leave it on a warm setting overnight or break up the cooking process over a couple days in order to get the thickness you're looking for.  If it becomes too thick, just add more apple juice to thin it out a bit.


I ended up with 2 pint sized jars of the apple butter.

This recipe will freeze well in plastic containers or follow proper canning procedures to store in glass jars.  This website is a fabulous resource for canning and preserving and is chock full of information, recipes and tips.


You can use apple butter as a spread on toast or bread, in a sandwich, or even as an alternative to oil when baking.  We like to top a wheel of brie cheese with the apple butter, bake, and then serve with toasted slices of baguette...  So yummy!


Our little Oliver has also discovered a love of apples.


And a love of climbing on the table and chairs to reach those apples.


I caught him in the act, the other day...


Say cheese!


...um... I mean apple!


Thanks for stopping by.


This post is part of my blog series, "31 Days of Words to Live By".  For the month of October, I will be sharing my favourite quotes and sayings while incorporating them into daily life and art projects.

This series was inspired by The Inspired Room, where you'll find other "31 Days" series among many other wonderful things!


Day 18: Apple Butter


I'm sharing this with...


.

Wednesday, June 29, 2011

The Ultimate Roast Chicken

Not only are whole raw chickens an economical meal choice, they are a delicious dinnertime option.  Leftovers can be incorporated into many things such as sandwiches, wraps, soups, stews, salads, casseroles... and the list goes on.  The bones and carcass can be used to make a great homemade chicken stock too.  Around here, they frequently go on sale for half off, so that's when we stock up our freezer!


I have stumbled upon an incredible recipe for cooking these tasty birds.  Even though it takes 5 hours in the oven, it is so worth it!  The end result is moist scrumptious chicken every single time.
Here's the original recipe.  And here's how I do it...


The Ultimate Roast Chicken
(This recipe is for 2 whole chickens, but can easily be cut in half for 1.
I like to make an extra big batch of the rub and keep on hand for quick and easy prep.)


4 teaspoons salt
2 teaspoons paprika
1 teaspoon onion powder
1 teaspoon dried thyme
1 teaspoon white pepper
1/2 teaspoon cayenne pepper
1/2 teaspoon black pepper
1/2 teaspoon garlic powder
2 onions, quartered
2 (4 pound each) whole chickens

  1. Preheat oven to 250 degrees Fahrenheit
  2. In a small bowl, mix together salt, paprika, onion powder, thyme, white pepper, black pepper, cayenne pepper, and garlic powder.
  3. Remove and discard giblets from chicken. Rinse chicken cavity, and pat dry with paper towel.
  4. Rub each chicken inside and out with spice mixture.
  5. Place 1 onion into the cavity of each chicken.
  6. Place chickens in a roasting pan (I use a 9x13 glass baking dish) and bake uncovered for 5 hrs, to a minimum internal temperature of 180.
  7. Spoon juices from bottom of pan over the chickens.
  8. Cover with tin foil and let chickens stand for at least 10 min before carving.

The pan drippings make a very delicious gravy, which should always be served in the fanciest gravy boat...


...one that even measures how much is left!


Thanks for dropping in.


...

Thursday, June 16, 2011

Honey Butter Munch

To appease Leo's serious sweet tooth, I made a big batch of one of our favourite sweet snacks today.

{Need to catch up on who Leo is?  Check out Friendship in a Box and A Heart Full of Art}


The recipe originates from the box of "President's Choice Toasted Oat Os Cereal"
{aka: cheap Cheerios}


Honey Butter Munch


1/2 cup salted butter
1/2 cup honey
1/2 tsp  vanilla
4 cup Toasted Oat Os Cereal
1 bag microwave popping corn, popped according to package directions
1 cup natural whole almonds {I prefer to use peanuts sometimes}


  1. Preheat oven to 220 degrees F
  2. In saucepan, melt butter with honey over medium heat.
  3. Stir in vanilla.  Remove from heat
  4. In large shallow roasting pan {I use two 9x13 glass baking dishes}, stir together cereal, popcorn, and almonds {or peanuts}.
  5. Pour butter mixture over, tossing to coat.
  6. Bake, uncovered for 40-45 minutes.
  7. Cool.

Makes about 15 cups.


We're in honey butter munch heaven!


Thanks for dropping by.


Leo is Lollygagging Across America  .  See where he came from


I've shared this post with...

Craft-O-Maniac Monday