Showing posts with label Organization. Show all posts

Friday, October 14, 2011

Day 14: Embracing the Toys and A Bunting Tutorial


"Wanting to be someone else is a waste of the person you are."
-Kurt Cobain


I think that sometimes I try to make our house into something that it's not...


...a house without the toys that young children acquire.

While although they can be fun and educational, I find most toys lacking in the home decor department.  Bright coloured plastic just isn't my finish of choice.  And until we finish our basement (at least a year or more away), the playroom also happens to be our living room... and kitchen... and dining area.

So instead of fighting it, I've decided to embrace it.  So toys aren't normally on the list of things to decorate our homes with - let's use them anyway!


Here's the how to...


Beautiful Baskets
I've aquired many lovely baskets of all shapes, sizes, and styles over the years.  Most of them now hold toys. Not only are they beautiful, they hide all the bits and pieces.  Plus, they're handy to walk around with while collecting toys at clean up time.


Cover the Clutter
A stack of folded blankets and a pair of knitted critters hide the unsightly stash underneath.


Designate and Display
Having a specific area for the majority of playthings makes tidy up time a breeze.  Putting books away in an organized fashion and displaying a few classic toys takes no time at all.


Gettin' Crafty
Since we're incorporating toys into the design of our home, why not incorporate the design style of our home into the toy area?  This bunting made from dictionary pages does the trick.


Want to create your own bunting?  There are countless examples all over the web and throughout Blogland.


Here's my how to...{within the how-to}


Rip 'em Out
I know it can be difficult, but just take a deep breath and do it.  Score with scissors and then rip those pages out!  I chose an old dictionary, but you could use any book, paper, or even fabric.  My pages already had the letters that I wanted, but adding stickers, stencils, or computer printouts are other great options.


Triangle Time
Mark out a triangular shape and cut out.


Get Gluing
Glue triangles to a length of ribbon.  Leave an equal distance of space between each one.


Let's Tie One On!
...or two, or three, or four.  Ribbons, string, fabric strips, beads, and little bells add flair to this bunting.
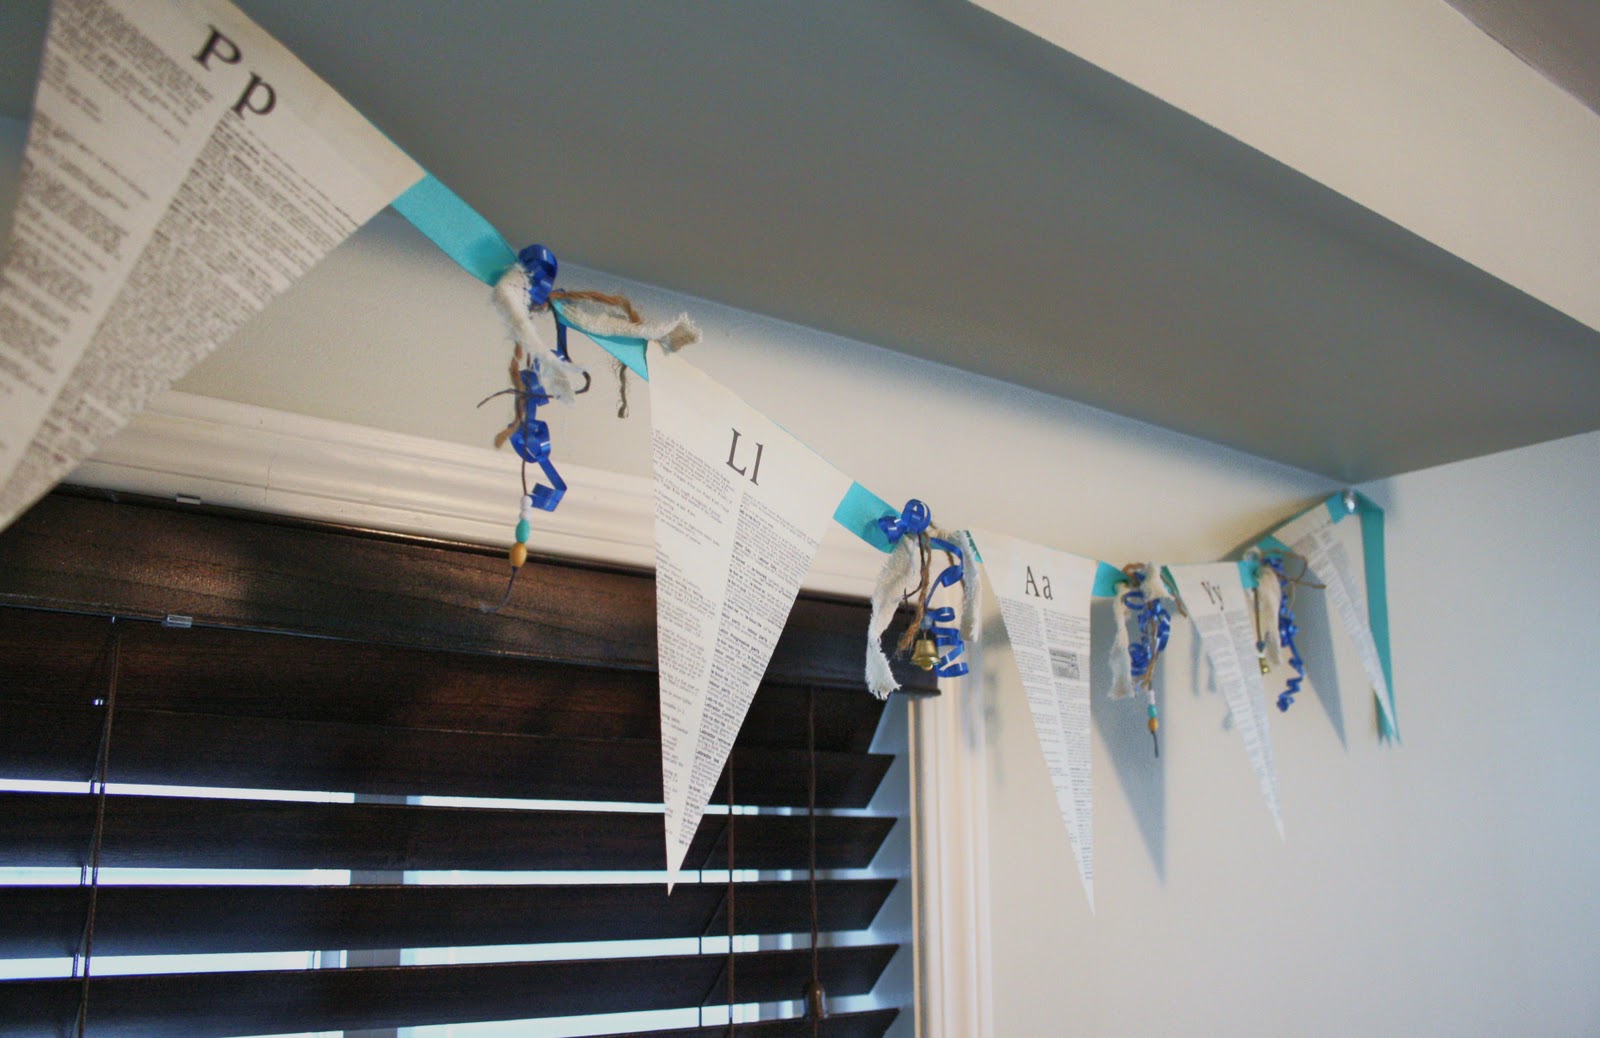


Now, we've fully embraced the toy maddness... with a little bit of organization and style!


Around here, the cheerful and fun filled atmosphere that comes with toys and the children who own them will no longer be wasted.


Thanks for popping by.


This post is part of my blog series, "31 Days of Words to Live By".  For the month of October, I will be sharing my favourite quotes and sayings while incorporating them into daily life and art projects.

This series was inspired by The Inspired Room, where you'll find other "31 Days" series among many other wonderful things!


Day 14: Embracing the Toys & A Bunting Tutorial 


Friday, April 8, 2011

Goodbye Junk Drawer, Hello Craft Drawer!

I am excited to announce that I now have a Craft Drawer!


This drawer was formerly known as the Junk Drawer.
My awesome Husband cleared it out so I could organize my growing collection of crafty supplies.
There are several new projects that I'm very excited about.
I've been trying to contain the materials for these projects in a basket...


As you can see, that wasn't going so well.
Last night, I realized that some organization was in order (and perhaps a good night's sleep) when I tried to turn up the TV volume with a pair of scissors.

Now, I have a system for my arts and crafts addiction.


The new Craft Drawer is now home to the supplies that I use the most. There's a lot more in my Art Studio {which is actually what most people would use as a master bedroom walk in closet}.
The basket is now for the project(s) that I'm currently working on.


I'll be sharing these projects soon!

I'm choosing this drawer as my fifth and final Hot Spot for Project: Simplicity.
At times, it has been a tough project to get motivated for, but doing it as a group sure has helped.
I am very pleased with the results! 
Check out what others chose to work on this week here.
Find more details on the overall project here.


Thanks for stopping by.


Saturday, April 2, 2011

A Pantry Peek


This week, I've been focusing on my latest crafty project instead of working on Project: Simplify.


So today, I finally got around to Hot Spot # 4...

The Pantry


I took everything out and realized that we have a very large collection of food...


It made me think of all the families that aren't so lucky...
  ...and with that in mind, the task seemed a lot less tedious.


So let's take a peek inside the pantry...


I was even able to achieve what I had previously thought impossible.
The canisters from the counter top actually fit inside the pantry!


So much better!

Now, with the cleaning project out of the way, I can get back to the crafty project.
I'm hoping to have it ready to show you tomorrow, but here's a sneak peek...


Can you guess what these tags are made of?
 

Thanks for dropping by.


Take a peek at some other simplified pantries here.

Monday, March 28, 2011

Want to play Shuffle Stuff with me?

Well, we've avoided a crisis.

We arrived home Saturday evening, after being away for 6 days, only to discover that we'd left behind the power cord for our laptop... and its battery was dead.

Would we be able to survive computerless while waiting for it to be mailed back to us?

source


Thank goodness we didn't have to find out.
We found a universal cord at the local electronics shop.

Crisis averted!

source


Since we were away this week, I was unable to work on Project Simplicity.


Better late than never!
So once the suitcases were unpacked, the washer and dryer were humming along, and the fridge and pantry were restocked... I could focus on...

Hot Spot # 3 : Kids Clothes & Toys

Oliver's wardrobe is one area that I have been bound and determined to keep on top of.
Back when I was pregnant and waiting for little Ollie, I washed and sorted all of the tiny outfits that we'd so generously been given.

source
 
It was then that I gave myself the goal that he would wear everything at least once.
And so far so good.

As Ollie grows out of his clothes, I store them away into bins in the closet and move the next size up from the bottom drawer of his dresser.


Now, toys are a different story.

As Oliver grows, so does his collection of toys.
And since our home of the moment (new house is less than a month away!)
is a tiny rented condo, space is a little bit of an issue.

Please note all of the stuff around the closet instead of in it.


Most days, I feel like I'm playing a game which I like to call "Shuffle Stuff".


The rules are pretty simple. 

1.  Shuffle stuff between baskets and bins and boxes and drawers.
2.  Shuffle piles of stuff from one room to another.
3.  Shuffle stuff to get to the other stuff that you need.

And make sure that the stuff that you need is at the back of a closet behind layers and layers of stuff and more stuff!


Well, I've tackled that stuff by giving it away, throwing it away, and packing it away.

Here's the result...


Please note the lack of stuff around the closet.

I had a successful round of Shuffle Stuff with this bin underneath the crib...


...and this little basket...


Today's game of Shuffle Stuff turned out rather well...

...in fact...

I think, for a change...

I won.


Thanks for stopping by.


Have a peek at other Hot Spot # 3 results here.

Friday, March 18, 2011

Paper Shredder for Hire

So it's Project: Simplify  time...


Every Monday for 5 weeks, a different Hot Spot is being announced.
Then it's time to get that spot in ship shape order.
Friday is the day to share about the experience.

This week's Hot Spot...
Paper Clutter.

Since we've been away all week, I started this project after our 3 1/2 hour drive home yesterday evening.

Space is at a premium, so we keep our important papers in a portable file box.


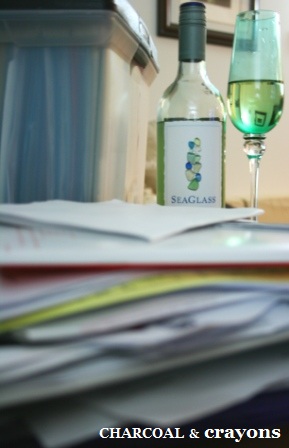
You can almost see it under all of the papers waiting to be filed into it.

After gathering up all of the other similar paper piles placed around the house, the first step was to pour a glass of wine.

It was such a nice way to unwind after travelling (and to avoid unpacking).


I couldn't resist this "Sea Glass" Sauvignon Blanc.  What a perfect match for my beach glass coloured wine glass (the set was a wedding present and includes several beautiful jewel toned colours).

I sorted those papers...

to be filed,
to be recycled,
to be shredded.

Then I took a look inside the box...


It was a little bit haphazard and disorganized.  So I redid the labels and did it the fun way...


...with stamps!

(also, another way to avoid unpacking).


Much Better!


If you don't have a paper shredder, you can get a basic one for a decent price at most department stores...

...or Oliver is available for a small fee.


Thanks for stopping by.


Check out some other paper clutter solutions at Simple Mom.

Friday, March 11, 2011

Hot Spot # 1 and excitement in folding

What do your dresser drawers look like?

Are they neat and tidy?  Or are they a jam packed rumpled mess?

Mine were getting... well... have a look for yourself...


They were so packed full and disorganized that things were starting to pile up...


Perfect timing to join in on Project: Simplify over at Simple Mom.


Every Monday for the next 5 weeks, a different Hot Spot is being announced.
Then it's time to get that spot in ship shape order.
Friday is the day to share about the experience.

Here's what I did for Hot Spot #1: Your Wardrobe


First, I put Ollie in his Jolly and put on some jumping and dancing music.


(yes - Oliver has his own computer mouse to play with)


I removed all of my clothes from the drawers and then sorted through them.
My 4 categories were...

clothes to keep
clothes to give away
clothes to throw out
clothes to re purpose the fabric into something else

Thank goodness I had a project supervisor to keep me on track...


Then I put away all of the clothes that I am keeping...


Beautiful, isn't it?

The biggest difference was made by the new way to fold shirts that I tried out.
I saw it on the TV show "Steven and Chris"
It just may change your life - well your drawers, at least.
If you're weird like me, and actually enjoy folding laundry, it might even excite you.


Here's the How To...

1. Lay your shirt out flat.


2.  Take your Left pointer finger and draw a line across the middle. 


3.  Place your Right pointer finger beside your left one.


4.  Draw a line with that finger straight up.


5. Pinch.


6.  While still pinching those two spots, cross your right arm Under your left and pinch at the bottom of the shirt.


7.  While still pinching everything, uncross your arms and shake it out a little bit.


 8.  Lay it back down on the surface like this...


9.  You can leave it like this...


10.  Or you can fold it over in half...


And there you have it!


Thanks for dropping by.