Showing posts with label Crafts. Show all posts

Friday, February 14, 2014

Love Painting


Happy Valentine's Day!  Today, I'd like to share a little painting that the kids and I created a couple weeks ago.  It was one of the lovely craft projects organized by our local Ontario Early Years Centre.   If you are lucky enough to live near one, I urge you to go check it out!  It's a great place to meet other parents of young children and is a nice little outing for the kids.  They have all kinds of activities and programs - and it's all free!  This particular project is a simple one.  We used Oliver's hand print and Amelia's foot prints.  All you need to create your own is a blank canvas, red water based ink or paint, a red permanent marker... and a little bit of love.


Saturday, January 25, 2014

Little Hearts

When Amelia goes down for her afternoon nap, Oliver and I have been enjoying some quality time together.  Sometimes we do a craft; sometimes we bake healthy cookies (I will post the recipe once it's perfected!); sometimes we read a pile of books in our big white comfy chair.  All of these times are extremely precious to me and I've been trying to soak up every minute.  For in the back of my mind, I am thinking the word "September".  That is when this little boy, whom I have spent most of my waking (and sleeping) hours with over the past 4 years or so, will start going to school.  Seven more months with both of my little hearts at home with me.  Seven more months to make every moment count.


The other day, Oliver and I decided to do a simple craft while Amelia slept.  With Valentine's day coming up in a few weeks, we went with that theme.  Pipe cleaners and beads were all that we needed.


Oliver enjoyed stringing beads onto the pipe cleaners, which I then twisted into heart shapes.  Watching the quiet concentration of this small, yet so astoundingly grown up, boy was a moment that I will cherish.  What I will cherish even more, is what he said to me next...


"Mommy, I love doing crafts with you."


I am sharing this at the Moonlight and Mason Jars Link Party!


Tuesday, February 21, 2012

Framing with Burlap and Cardboard

On Valentine's Day I shared with you Oliver's first time using a paintbrush and the heart cut out painting that resulted.

Well, I loved that little painting so much (when I look at it, I see flowers blowing in the wind... what do you see?) that I had to frame it.  So I've done just that... but with a little twist.


Wednesday, November 23, 2011

Creating A Christmas Advent Tree

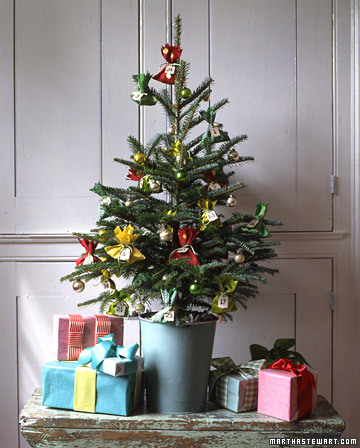
This year will be the first Christmas in our new house.  I am so excited about the holiday decorating, the baking, and the time we will spend with family and friends.  Since we've purchased a new large tree, the little tree from my apartment days was destined to stay packed away in the basement.  Until I saw this...


source


I'd been thinking of creating some sort of Christmas advent project for our son Oliver, so when I found this advent tree on MarthaStewart.com I knew that my search was over!  And as an added plus, my little tree would be able to spread some Christmas cheer once again.

Here it is all decked out with little presents for Ollie - one for each day in December leading up to Christmas...


And here's how it all came together...


Cut It Out
Burlap can be found at the local hardware store this time of year, but instead of wrapping trees and plants with it, start by cutting it into squares or rectangles.  The size will depend on the toys and treats that will go inside.  Jute string is also cut into lengths.


Toys & Treats
Place a toy or treat - or maybe even both - in the center of each burlap square.  Some suggestions...


Dinosaurs and Chocolate Santas


Cars and Coins (chocolate or real)

Whether it's crayons, little books, blocks, cars, or dinos, whatever your child is into at the moment will do!


Wrap It Up
Bring the corners of the burlap together then tuck as necessary and tie with a piece of jute, string or ribbon.


Nifty Numbers
Stick-on numbers get the job done quickly and easily.  If you have the time, other options for adding on numbers include painting, stenciling, or using decorative tags.


"Tree" Lights
Since there aren't any electrical outlets where our advent tree sits, I thought that a string of battery operated Christmas lights would work, but I was unsuccessful in finding any at our local department store.  So I picked up a few packages of these battery tea lights or "tree" lights.  It's so worth the little bit of extra effort to turn each one on/off individually.  The flickering glow is absolutely magical!


Top That Tree
A little teddy makes the perfect tree topper.  A piece of numbered burlap is tucked into the little pouch on this guy (it's actually for a gift card), but could also be pinned, tied, or sewed on.


Our completed Advent Tree is a welcoming addition to our front foyer.  It is decorated simply with ribbon, "tree"lights, and 24 little burlap bundles; a knitted scarf becomes a tree skirt when draped around the base.


The tree sits on my recently completed Weathered Turquoise Side Table.  The drawers will be perfect for tucking away the burlap and jute when they are opened each day.  That way they'll be organized and ready for next year.  A pretty box or basket would work great for this too.


Now all we have to do is wait until December 1st!


Thanks for stopping by.


I'm sharing this with...

Stay At Home Nation


.

Thursday, October 27, 2011

Day 27: Spooky Spider Silhouette


"Darkness cannot drive out darkness; only light can do that.
Hate cannot drive out hate; only love can do that."

- Martin Luther King Jr.


This year for our outdoor Halloween decor, I've decided to utilize light.  Orange tissue paper and card stock paper have transformed our front door window into a Spooky Spider Silhouette...


I was inspired to create this after seeing Halloween Window Clings for sale in one of the weekly flyers.


Trace & Transfer
Once my spider was drawn out in pencil, I went over the outline with a Sharpie.  Using carbon paper (available at any office supply store), I traced and transferred the image onto pieces of card stock (I didn't have black so used dark blue instead). 


Cut!
Time to cut out all those wiggly legs.  Stacking 2 - 3 pieces of card stock together is a quick way to make multiple spiders.


Trim & Tape
I found it easiest to tape and trim the orange tissue paper right on the window, rather than measuring and pre-cutting.


Give It Some Glue
Tape the legs to the body of the spider and coat one entire side with a glue stick.


Stick That Spider
Place the spider onto the orange tissue paper and smooth down...


Inside View


When Darkness Falls
Wait until it is dark outside and then turn on your inside lights...


Outside View


...and let your Spooky Spider Silouhette shine...


I'm working on doing our upper front windows too.  That way, our whole house will have an eerie glow!  Stay tuned for more photos...


Thanks for dropping by.


This post is part of my blog series, "31 Days of Words to Live By".  For the month of October, I will be sharing my favourite quotes and sayings while incorporating them into daily life and art projects.

This series was inspired by The Inspired Room, where you'll find other "31 Days" series among many other wonderful things!


Day 27: Spooky Spider Silhouette
.

Wednesday, October 19, 2011

Scrappy Sparrows Template


Since I've had some requests for the template for the Scrappy Sparrows, here it is!


Right click on the image and "Save Image As".  Once the image is saved to your computer, print, cut out, and get started on creating your own flock of Scrappy Sparrows.


Check out the original tutorial for all of the step-by-step details.


I'm sharing this with...


.

Friday, October 14, 2011

Day 14: Embracing the Toys and A Bunting Tutorial


"Wanting to be someone else is a waste of the person you are."
-Kurt Cobain


I think that sometimes I try to make our house into something that it's not...


...a house without the toys that young children acquire.

While although they can be fun and educational, I find most toys lacking in the home decor department.  Bright coloured plastic just isn't my finish of choice.  And until we finish our basement (at least a year or more away), the playroom also happens to be our living room... and kitchen... and dining area.

So instead of fighting it, I've decided to embrace it.  So toys aren't normally on the list of things to decorate our homes with - let's use them anyway!


Here's the how to...


Beautiful Baskets
I've aquired many lovely baskets of all shapes, sizes, and styles over the years.  Most of them now hold toys. Not only are they beautiful, they hide all the bits and pieces.  Plus, they're handy to walk around with while collecting toys at clean up time.


Cover the Clutter
A stack of folded blankets and a pair of knitted critters hide the unsightly stash underneath.


Designate and Display
Having a specific area for the majority of playthings makes tidy up time a breeze.  Putting books away in an organized fashion and displaying a few classic toys takes no time at all.


Gettin' Crafty
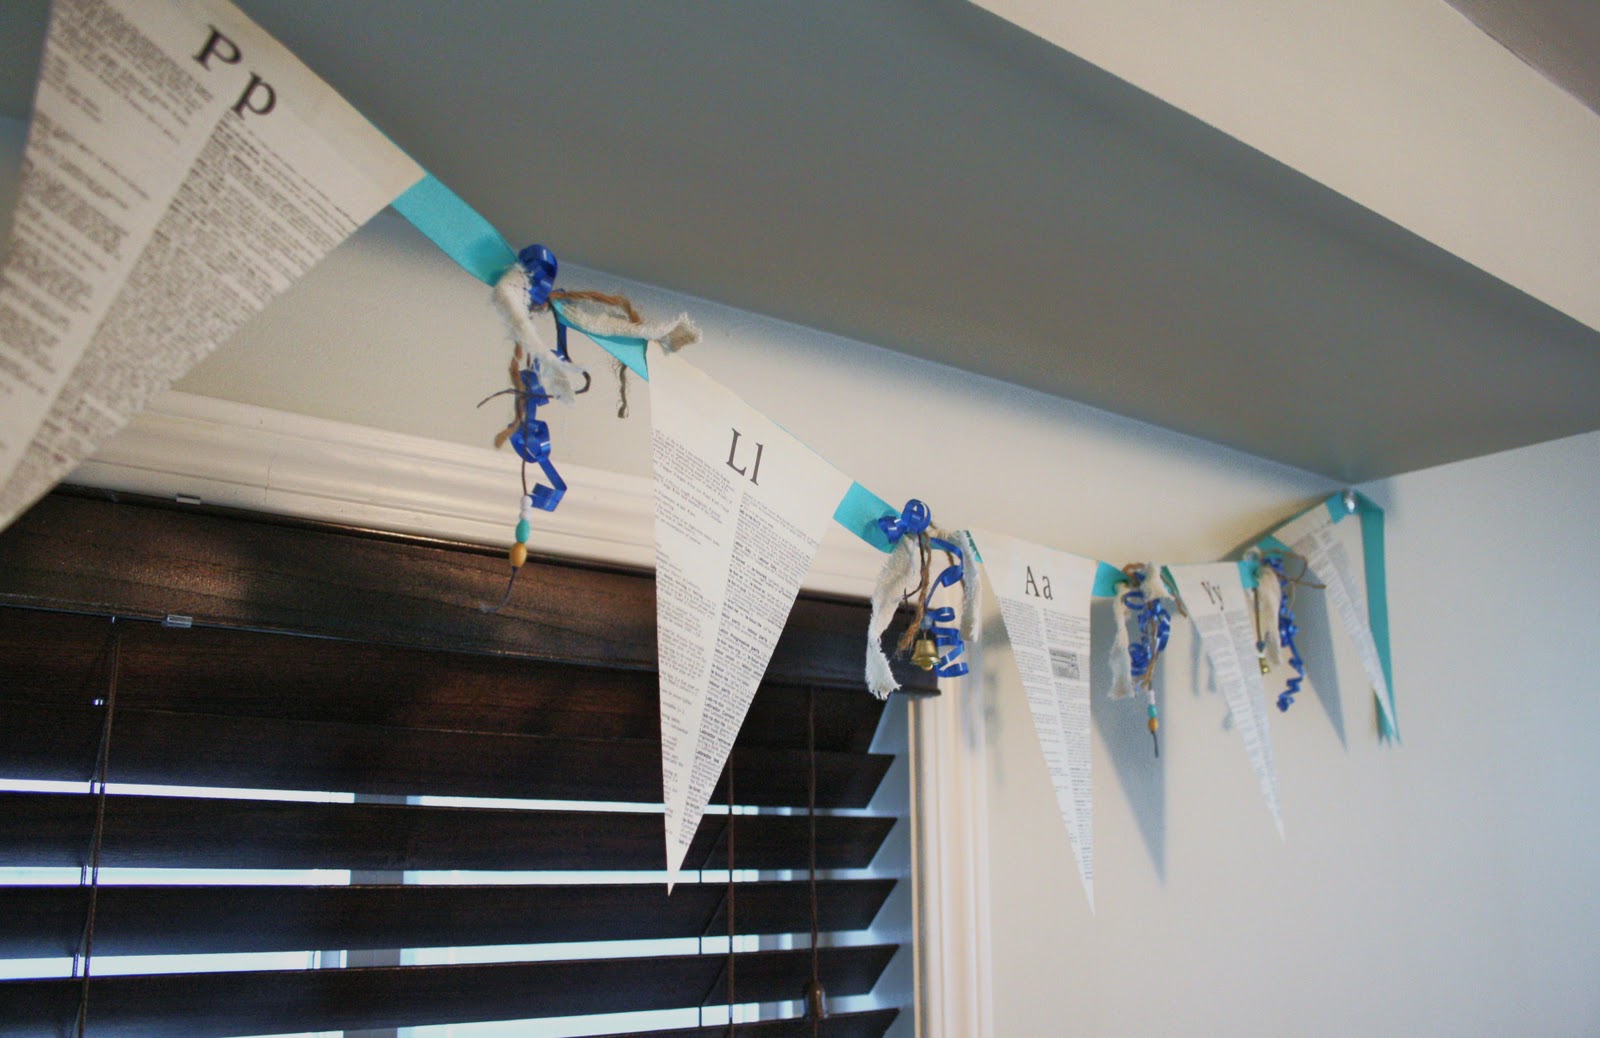
Since we're incorporating toys into the design of our home, why not incorporate the design style of our home into the toy area?  This bunting made from dictionary pages does the trick.


Want to create your own bunting?  There are countless examples all over the web and throughout Blogland.


Here's my how to...{within the how-to}


Rip 'em Out
I know it can be difficult, but just take a deep breath and do it.  Score with scissors and then rip those pages out!  I chose an old dictionary, but you could use any book, paper, or even fabric.  My pages already had the letters that I wanted, but adding stickers, stencils, or computer printouts are other great options.


Triangle Time
Mark out a triangular shape and cut out.


Get Gluing
Glue triangles to a length of ribbon.  Leave an equal distance of space between each one.


Let's Tie One On!
...or two, or three, or four.  Ribbons, string, fabric strips, beads, and little bells add flair to this bunting.


Now, we've fully embraced the toy maddness... with a little bit of organization and style!


Around here, the cheerful and fun filled atmosphere that comes with toys and the children who own them will no longer be wasted.


Thanks for popping by.


This post is part of my blog series, "31 Days of Words to Live By".  For the month of October, I will be sharing my favourite quotes and sayings while incorporating them into daily life and art projects.

This series was inspired by The Inspired Room, where you'll find other "31 Days" series among many other wonderful things!


Day 14: Embracing the Toys & A Bunting Tutorial 


Tuesday, October 11, 2011

Day 11: The Barefoot Rule

When I saw this saying...


"Beach House... No Shoes Required"


...on a hand painted sign, I new it was a perfect slogan for our house.  First of all, I love the relaxed coastal, beach house style.  Secondly, when the weather is nice, you'll usually find my husband walking around the neighbourhood in bare feet.  So after I cleaned up the footprints left all over the house (for the umpteenth time), I decided that the Jute Calendar required a little transformation.

A simple dry erase marker turns this once schedule supporter into...


...a place to display our home's barefoot rule.


So come on in, take your shoes off, relax, and stay awhile!

If you'd like to see how I made the framed weaved jute, check out this tutorial.


Thanks for stopping by.


This post is part of my blog series, "31 Days of Words to Live By".  For the month of October, I will be sharing my favourite quotes and sayings while incorporating them into daily life and art projects.

This series was inspired by The Inspired Room, where you'll find other "31 Days" series among many other wonderful things!


.

Monday, August 8, 2011

Ollie's House

There’s just something special about cardboard boxes.  While they can be filled with trinkets and things, they are also filled to the brim with possibilities.  A rocket ship, a car, or a house...


...your imagination is your only limitation.


Since our move earlier this year, the basement has been storing several cardboard boxes in various stages of unpacking.  A few of those boxes just so happen to be the perfect size for a little boy to call his own.

So armed with a glue gun, a sharp knife, and pair of scissors I was able turn a couple of cardboard boxes into Ollie’s House.


It was a spontaneous sort of thing so I don’t have photos of the creation process.  I’ll try my best to explain, but if you’d like any further information on this project, please don’t hesitate to email me at andrea.brand.art@gmail.com


Here’s the how to...


Box it up

You’ll need 1 large box and 1 small box.  The ones that I used can be purchased at The Home Depot and cost around $3.50.  They come folded flat and need to be opened up and taped shut on one end.  The large box will become the main structure of the house, while the small box will be for extras such as window frames and the chimmney.


source


Cardboard Cutout

Cut off the flaps of the large box and set aside (these will become the roof).  Turn the box upside down.  Cut out an upside down L shape for a door.  Cut out squares for windows (the Home Depot logos on the sides work perfectly for this).  A little window can be cut into the door as well.  A pair of scissors or a sharp knife can be used for the cutting (I used a combination of both).


Raise the Roof

Glue together 2 of the flaps that were cut from the large box.  Repeat with the other 2 flaps.  You now have 2 panels which will form the main roof.


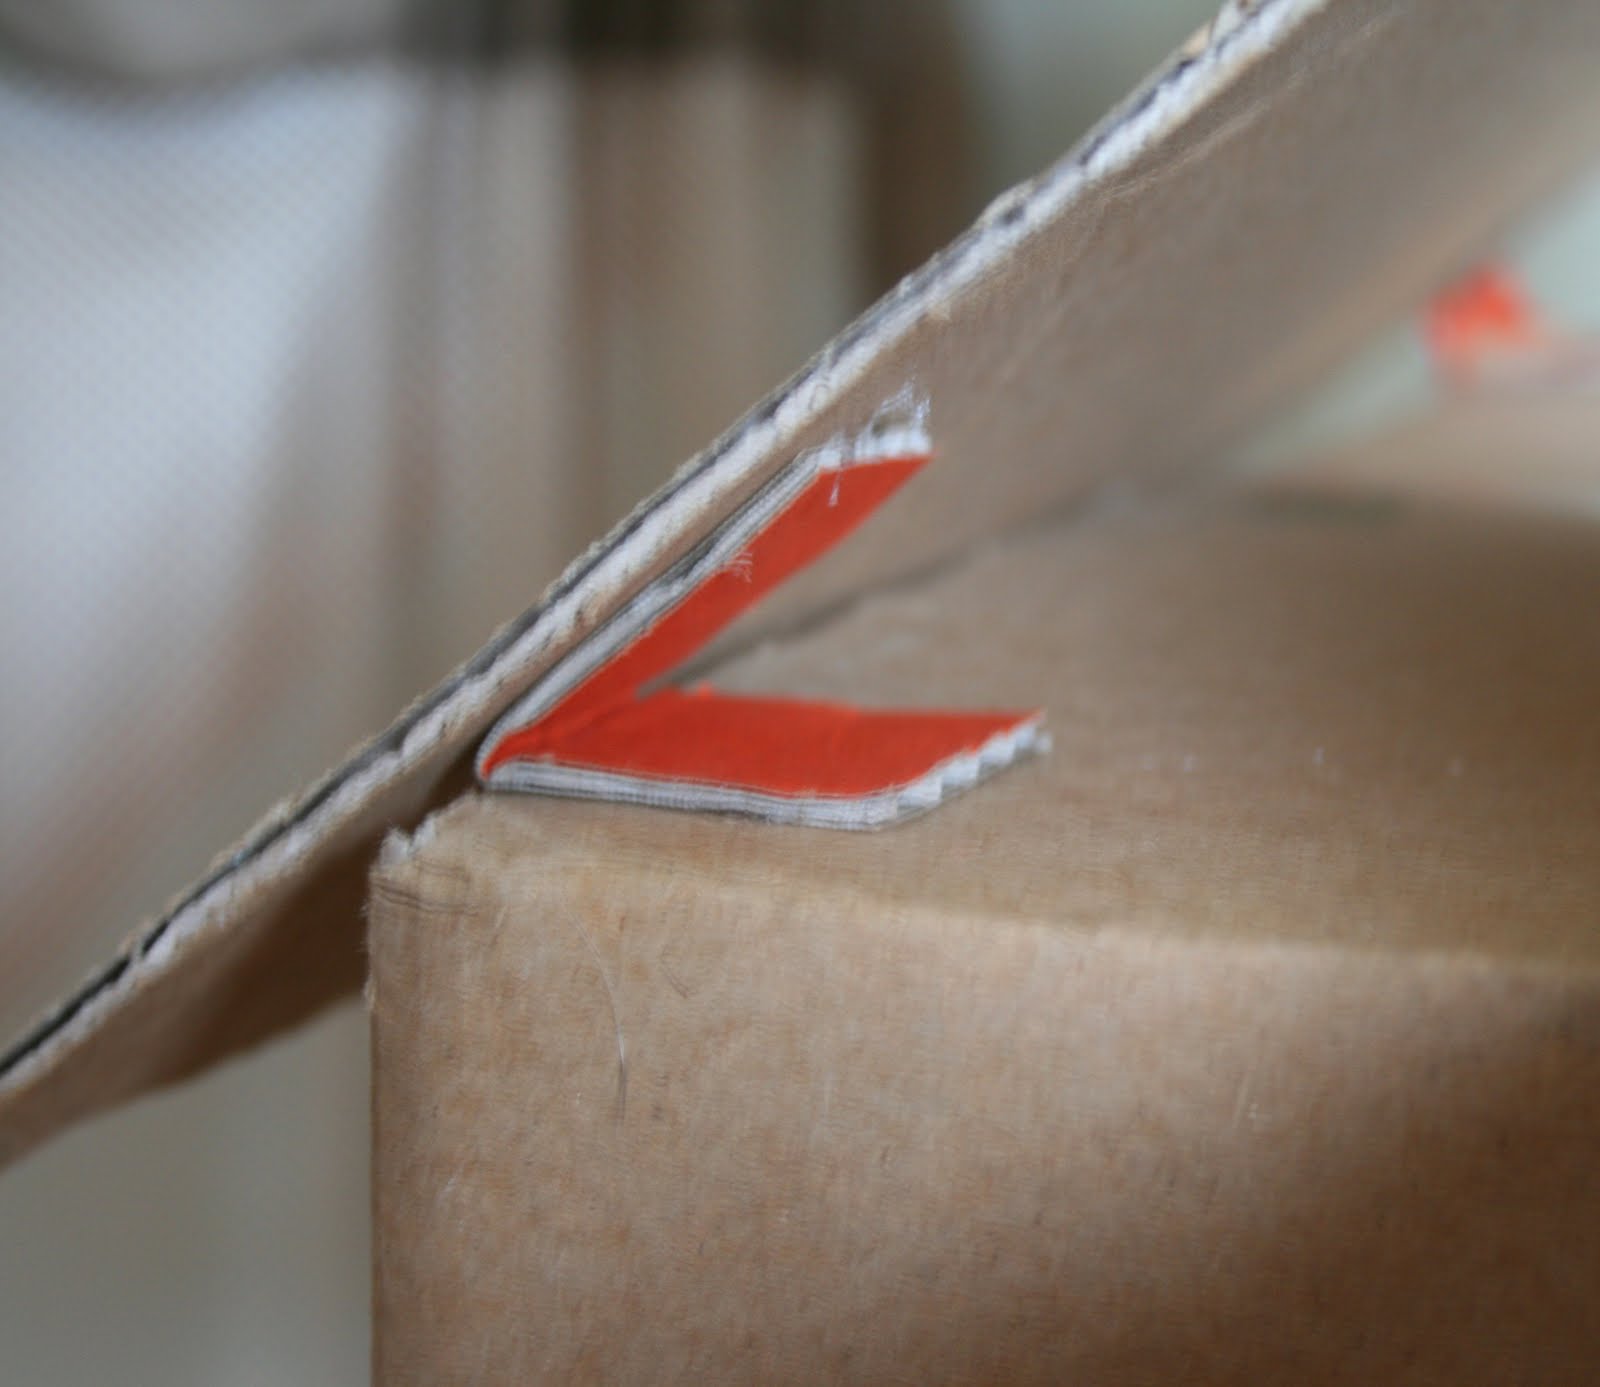
Make small strips about 2” in length out of the extra cardboard cut from the windows.  Fold strips in half.  Using the strips, glue the two main roof panels together.   These strips are also used like L brackets to attatch the roof to the house.


Cut 2 flaps off of the small box to use as the little roof over the doorway and attatch to the house using strips as described above.


Window Wonder

To make the frame around the window, take the extra piece cut from the window and place on the side of the small box.  Trace around the window cutout and from corner to corner.  Cut along these lines.  Here’s a quick little illustration...


Glue the pieces around the window.  Extra cardboard can be used to create a cross pattern within the window (in technical terms these are called “muntins”).  Repeat for the other windows.


A Charming Chim Chim Cher-ee

Use extra pieces from the small box to create a chimmney.  Glue 4 similar sized rectangular piecies together to create a little box.  Line up the end of that little box with the edge of the roof and trace along the roof line.  By doing this, you’ll be able to cut the bottom of your chimmney at the correct angle.  Leave the shortest side of the chimmney a little longer than the rest and fold to create a flap.  Use this flap to glue the chimmney to the roof.  Cut out a square slightly larger than the chimmeny and glue flat onto the top.  Cut and glue narrow strips to the edges of the square.  Top off your chimmeny with a section cut from an empty toilet paper or paper towel roll.


Knock Knock

You can’t answer the door without a doorknob!  I stole this knob from our master bedroom nightstand.  A few stacked pieces of cardboard create a lovely little detail that also adds extra depth for the knob’s screw.


The Great Debate

I’ve been debating over painting Ollie’s house or leaving it the way it is.  For some reason, I really quite like the cardboard look.  But I can imagine it painted... maybe a light blue with white trim like our house... and I think I’d like the look of that too.  So what do you think...


Does Ollie’s House need a coat of paint?


Any suggestions would be much appreciated.  Please feel free to leave a comment (I am so grateful for each and every one) and check out the poll in the side bar to cast your vote as well!


Thanks for stopping by... around here, the door is always open.


Together, lets share, inspire, & celebrate...

Wednesday A Beach Cottage . Handy Man Crafty Woman . Blue Cricket . Elements Interiors . My Girlish Whims
Thursday Delightful Order . Momnivore’s Dilemma
Friday Funky Junk Interiors . Lovely Crafty Home . Tatertots and Jello .  At the Picket Fence . Iron Violet Designs
Serenity Now . The Designer Garden . Miss Mustard Seed
Saturday Lolly Jane