Thursday, April 28, 2011

Let the Big Project Begin!

Well, tonight Oliver, Roxy, and I are headed off to spend the night in the new (empty) house!  It'll be like camping, complete with blowup mattress.  Maybe I should pack the marshmallows!
Tomorrow I am starting this weekend's project.  It's a big one and I'm so excited to get started!

Since the new house doesn't have the internet hooked up yet, I won't be posting this weekend.

But if you want to see what we're up to, head on over and Like the
I'm hoping that I'll be able to post some quick updates over there.

In the meantime, here's the story of how we found our house that I wrote about a while back...


And finally, I just had to snap a couple pictures of Oliver today.  He learned how to climb onto the couch by himself!


That was where he found the Wii remote... into the video games already...
He's changing from a baby into a little boy, right in front of my eyes.


Thank you for stopping by.


Wednesday, April 27, 2011

Jute Calendar

A calendar made of jute?  That's right!
After seeing this Erasable Dinner Menu Frame made by Stephanie Lynn at Under the Table and Dreaming, I was inspired to make this...


The most important tools to complete this project are time and patience.
Other than that, you'll need jute, a frame with mat {mine is matted to 11"x14"}, tape, a pencil, scissors, a glue gun, and a dry erase marker.

Here's the how to...


Trace.
Take apart the frame and trace the inside of your mat onto the cardboard inside the frame.


Do the math.
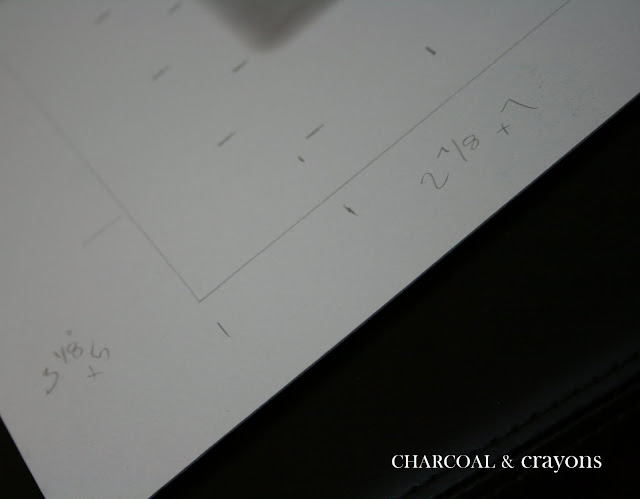
Mark out 7 equal vertical columns (for the days) and 5 equal horizontal rows (for the weeks).
{mine worked out to 1 7/8" sections across and 2 1/8" down}


Snip the string.
Cut the jute into pieces about an inch larger than the inside dimensions of your mat.
A good way to cut large amounts of string is to cut one piece to size.  Then use that as a guide, folding the string back and forth along that guide.  Once you have several measured out, cut the loops at the ends.


Stick to it.
With a piece of tape face up, stick on the ends of the jute.  The type of tape doesn't really matter since it will just temporarily hold the pieces in place.


Line 'em up.
Line the string up with the tracing of the mat and stick down.  Determine how many strings it will take to cover each section that you measured out.  {Mine required 15 strings per vertical column and 16 strings per horizontal row} 


All bundled up.
Count out the number of strings for each section and wrap a piece of tape around the end of each bundle.  This is just to keep the sections separate and will be removed later.


Start in the corner.
Once you have string taped along 1 long side and 1 short side (like an 'L'), you're ready to start weaving.


Starting in the corner, line up your pieces of jute from one section and glue each one down to the cardboard.


Continue on... and on... and on.
Overlap the next section, securing each strand with glue.  Continue on, weaving the sections over and under each other.  {once I got in my groove, I was gluing 3 or 4 strands at a time}  Remove the tape as needed.


Put it all together.
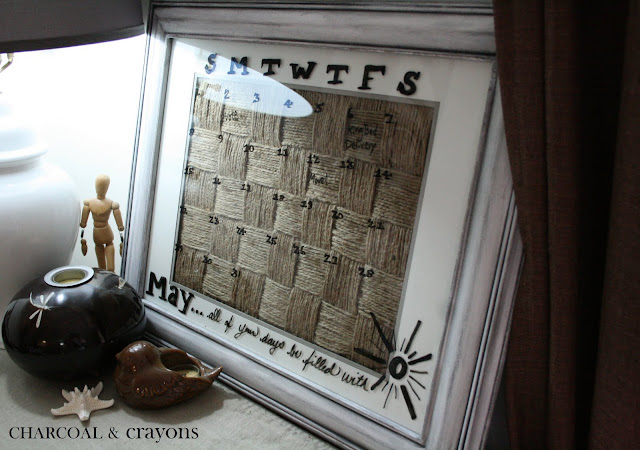
Reassemble the frame, putting in the glass, mat, then cardboard with the weaved jute.  I painted the old frame for a fresh new look.


I think it looks quite nice just plain.  Writing on the glass with a dry erase marker turns it into a calendar, a message board, or anything your imagination can come up with.


Now, we're all ready for the month of May!


If you have any questions, let me know in the comments or feel free to email me at andrea.brand.art@gmail.com


Thanks for stopping by.

Tuesday, April 26, 2011

Home Sweet Home

Today was the day that we've been waiting for...
We received the keys for our house today!

Since we have until the end of May to move out of our condo, I'll be painting {among some other exciting things} this weekend.  So today we went over to check everything out and drop off a few essentials like soap, toilet paper, and Diet Pepsi.  I brought along my camera and tripod hoping to get a nice picture of us on our new porch, but it was pouring rain.  Maybe next time!

So in the meantime, here's a snapshot of the house from a previous visit...


Thanks for stopping in.


I'm sharing this with...


Good Life Wednesday at A Beach Cottage


Sunday, April 24, 2011

Simple Starfish Display

I've been thinking of doing this project ever since I came across a roll of lovely light turquoise ribbon.  Since I've run out of supplies for my current project... and all the stores here are closed for Easter... tonight was the night!

This Simple Starfish Display was very easy to complete.  A dollar store frame, ribbon, and a glue gun were all I needed to make a home for this little guy from our Florida vacation.


Here's the how to...


Snip it.  Snip it good.
Cut the ribbon into pieces slightly larger than the inside dimensions of the mat for your frame {be sure to choose a frame with enough thickness to accommodate your starfish - a shadow box could work too}.  You'll need enough ribbon to cover both vertically and horizontally.


Line up and glue down.
On the back of your mat, line up the strips of ribbon, gluing along 1 vertical side and 1 horizontal side.


Over, under, over, under, over, under...
Weave the ribbon together by alternating the strips over and under each other.  Secure the ends with glue.


The star of the show.
Flip the mat over and glue the starfish in place.


I purchased my starfish, but if you're displaying a beach find, a tag with the place and date of where and when it was found could be a nice addition.  Or that info can just be written on the back of the frame.

Put the frame back together and there you have it.  An attractive and safe place to display your starfish... or whatever your heart desires.


Thanks for stopping by.

Saturday, April 23, 2011

Another Man's Treasure

In honour of my favourite Time Traveler (more on that shortly), I thought I'd share a little blast from the past.

When I was taking art in college, I experimented with incorporating unusual things in some of my work.

This first painting is one of my favourites and hangs above Oliver's change table at the moment.


The textured black foreground is a combination of sand, dryer lint, and acrylic paint.


This next painting is somewhat inspired by the Three Little Pigs fairytale.  Except in this version, the pigs are the big bad characters.


This one incorporates actual garbage items such as fast food trash, hamster treats, plastic and paper bags, shredded newspaper, and string.  Everything is sealed in with a two part apoxy that dries hard and shiny.


I really enjoyed my time studying art in college.  It was wonderful being surrounded by such a creative environment and people who encouraged experimentation.

Let me know what you think.  Any comments or criticisms are welcome!


Now for the wibbly wobbly timey wimey time traveling part ...

Is anyone else super excited for the new episode of Doctor Who tonight?
For the first time ever, this British show is premiering in North America on the same night.
I may be revealing my inner geek here, but I've been so excited since I found out a week or so ago...

Geronimo!


Thanks for dropping in.


Thursday, April 21, 2011

The Moonlight Madness Moustache

Today we went to the Moonlight Madness Sale at our local Zellers.  It just so happened that we arrived just before the 6pm start time.  So Oliver and I headed to the very end of the long line of shoppers.

I was soon reminded that generosity and kindness are alive and thriving in our small town.

For, as soon as I reached the end of that line, the couple ahead of me asked me if I'd like a cart.
The gentleman proceeded across the parking lot, returned with a cart in tow, and helped me get little Ollie situated.  Oh how nice!

But wait!

There was something even nicer about that fellow...

He had the most wonderful moustache.  It was one of those with the delightful little curls at the ends.

Sort of like this guy...

source


His name is Son of Moustachio and he is also available in a plush version...

source


Check out www.shawnimals.com to find an entire collection of curious characters. 


And to all of you kind and thoughtful people out there (who deep down are Moonlight Madness Moustache Men at heart)...


Thank you. 


What actions of kindness and generosity have you experienced lately?


Wednesday, April 20, 2011

Pinterest and Peanut Butter Buttons

The other night started out just like any other.  I sat down at the computer to check email, reply to your wonderful comments, and leave some of my own.  Well, that didn't last for very long.

One of those emails was one that I have been wishing, waiting, and hoping for.  Within that email was an invitation to Pinterest.

You may have heard Pinterest mentioned on some truly amazing blogs out there.  Blogs such as Tatertots and Jello, Perfectly Imperfect, Funky Junk Interiors, A Beach Cottage, and Welcome to Heardmont.

Basically, Pinterest is a place to create your own virtual inspiration boards where you can browse and collect (or "pin") images.  Pinterest also saves the original link to the image, so finding more information is easier.


You can find my Pinterest collection at


So instead of my regularly scheduled evening of comments and emails... I found myself pinning on Pinterest... until 5am.


{I wonder how many times I will type Pinterest by the end of this post}


One of the inspiring things that I came across, was a tutorial for button shaped peanut butter cookies.  Since I like having homemade cookies around here, I had to try making them.
If it's something you'd like to do too, I highly recommend this excellent tutorial at Bakerella.

Instead of using the suggested cookie mix, I used the recipe that I've been using for years.  Originally, it's from the Kraft peanut butter jar {find it online here} and contains only 3 ingredients.

Super Easy Peanut Butter Cookies

1 cup peanut butter
1/2 cup sugar
1 egg
  • Preheat oven to 325 degrees
  • Mix all ingredients with a large spoon until well blended.
  • Roll into 24 balls and place 4" apart on baking sheets.
  • Flatten with fork. {leave as balls if making buttons}
  • Bake 10-20 min. or until lightly browned.

I usually make a double batch, because they disappear quickly!
{please don't tell anyone that I forgot to double the peanut butter in my first batch of buttons... still edible, but oh what a difference 1 cup of peanut butter makes!}


I'm not sure why mine cracked around the edges.  I guess it could be any number of things... like the recipe, the cooking time/temp, or the size of... um... balls?  Have any suggestions?  Might have to try a few different things to figure it out - and if I do I'll let you know.

UPDATE: I made these again, and used the 2L bottle cap to press down the cookies before baking, as well as after taking out of the oven.  This resolved most of the cracked edges!


Aren't they cute as a button? {lame pun intended}
I think they add a little bit of whimsy to the ordinary peanut butter cookie. 


Now, I'm off to bed before 5am rolls around.  Are you on Pinterest?  Send me your info... I'd love to check out your boards!


Thanks for stopping by.

Monday, April 18, 2011

Stuffed Peppers and Sliced Potaoes

Well, I think it's time to add to the Recipe Box!

I always find myself searching for new ways to use good ol' ground beef.
Burgers and meatballs are great... but it's nice to incorporate something a little bit different into the mix.

I had some bell peppers that needed using up so I tried out this recipe for Stuffed Peppers.  They turned out really yummy!  I strayed from the recipe a little bit by adding sauteed onions into the meat and grated cheddar cheese sprinkled on top.  Next time, I'll try adding cheese to the meat mixture too.


STUFFED PEPPERS

  • 1 pound ground beef
  • 1/2 cup uncooked long grain white rice
  • 1 cup water
  • 6 green bell peppers
  • 2 (8 ounce) cans tomato sauce
  • 1 tablespoon Worcestershire sauce
  • 1/4 teaspoon garlic powder
  • 1/4 teaspoon onion powder
  • salt and pepper to taste
  • 1 teaspoon Italian seasoning
  • 1 small onion, chopped
  • grated cheese
  1. Preheat oven to 350 degrees F (175 degrees C). 
  2. Place the rice and water in a saucepan, and bring to a boil. Reduce heat, cover, and cook 20 minutes. In a skillet over medium heat, cook the beef until evenly browned. Add chopped onion and cook until translucent.
  3. Remove and discard the tops, seeds, and membranes of the bell peppers. Arrange peppers in a baking dish with the hollowed sides facing upward. (Slice the bottoms of the peppers if necessary so that they will stand upright.)
  4. In a bowl, mix the browned beef, cooked rice, 1 can tomato sauce, Worcestershire sauce, garlic powder, onion powder, salt, pepper, and grated cheese. Spoon an equal amount of the mixture into each hollowed pepper. Mix the remaining tomato sauce and Italian seasoning in a bowl, and pour over the stuffed peppers.  Sprinkle with cheese.
  5. Bake 1 hour in the preheated oven, basting with sauce every 15 minutes, until the peppers are tender. 

Now, also in my fridge were a couple leftover baked potatoes that had been cooked on the barbeque the other night.  They turned into these...


SLICED POTATOES
  • leftover baked potatoes
  • vegetable oil
  • salt

  1. Heat oil in skillet or electric frying pan.
  2. Add potato slices, turning occasionally.  Cook until both sides are golden brown.
  3. Remove from pan onto a plate covered with paper towel.
  4. Sprinkle with salt.

These were so delicious and the skins were delightfully crispy.  I served them with caramelized onions and those potatoes are leftovers no longer, that's for sure!  My husband told me that we should use up our leftover potatoes like this from now on.  Into the recipe box it goes!


Thanks for stopping by.


I'm sharing this with...

Craft-O-Maniac Monday at Craft-O-maniac


Sunday, April 17, 2011

The Covered Notebook

Normally when inspiration hits or I come across a new project to try, I find myself scrambling for a scrap piece of paper... card stock, an envelope... maybe even an old receipt.

So I picked up a little spiral bound notebook to jot down my thoughts and keep all my blog related ideas in one place.

Now this may sound a little strange, but instead of writing in it...
I've been staring at it.  It's your average, everyday, blah looking notebook.
Shouldn't a book that's supposed to contain my inspiration look a little bit more... well... inspirational?

So I've been studying it and trying to figure out how to make it look better.  I've tried a few things, but that spiral binding kept getting in the way and foiling my ideas.

Finally, I've come up with a soloution that I'm happy with and it was actually quite simple to do.


Here's the how to...

Banish that evil spiral! {at least for now}
Carefully remove the spiral binding by unhooking the ends and untwisting it from the pages.


Separate the elements.
Set aside the spiral and the pages for later.  We'll be dealing with the front and back covers.


What inspires you?
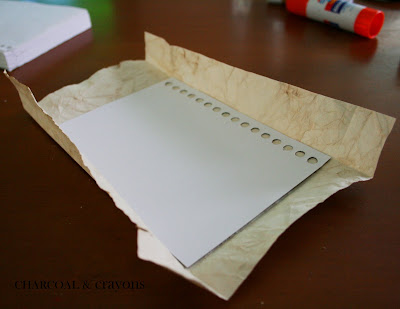
Choose a favourite paper... or even fabric... and cut it to fit the covers about an inch larger on all sides.  {I chose the Vintage Tea Dyed Paper that I created earlier this week.}
Glue down the cover and crease the edges.


Glue it.
Glue down the side panels.


Cut & paste.
Clip the corners of the top and bottom panels and glue down.


Let your light shine.
Hold up to a window or light box and pencil in where the holes are.


Punch it.
A standard hole punch goes through those penciled in circles.


Give it a Glaze.
A nice coat of Mod Podge gives the covers some added durability.
{If you're using fabric, there is a fabric version of Mod Podge available.}


Reassemble.
Put your notebook back together.  Line up the covers and pages and welcome back the spiral by twisting through the holes and re-hook the ends.


So much nicer than the ordinary cover!  I even made a few fabric flowers to embellish it even more, but I decided that I liked it without them.  What would you use to cover your notebook?


This morning, as I was writing up this post, I couldn't help but snap a few pictures of Oliver.  He was following his pal Roxy all around the house.


And I just love his reaction when we ask him, "Oliver, can you pet your puppy dog?"


Thanks for stopping by.